Sending Solana with SSP
This guide walks you through sending SOL or an SPL token from an SSP wallet end to end: five steps, one signing prompt in the extension, and one co-signature on your phone. The flow is the same one you already know from Sending Bitcoin with SSP — what differs on Solana is what the review screen is checking, and what the very first send costs.
New to SSP? Set up your wallet first with setting up your first SSP wallet. For the background on how SSP holds SOL at all, read Solana in SSP.
Before you start
Four prerequisites — none of them optional.
- Both paired devices are powered on and unlocked. SSP's 2-of-2 model needs signatures from both. If your phone is dead or asleep, the send will not complete.
- Solana is enabled in the chain selector. If you have never used SOL in SSP, enable it once; the extension and SSP Key sync the new chain together.
- You have the recipient address from a trusted source. Copy it — never type it. Solana addresses are base58 and case-sensitive, so a single wrong character is not a typo you will notice.
- You have enough SOL to cover the amount plus the fee reimbursement. You do not need a separate gas balance, but the vault does repay the fee payer out of the same transaction. The section on what the first send costs, below, has the figures.
Step 1: Open the send screen
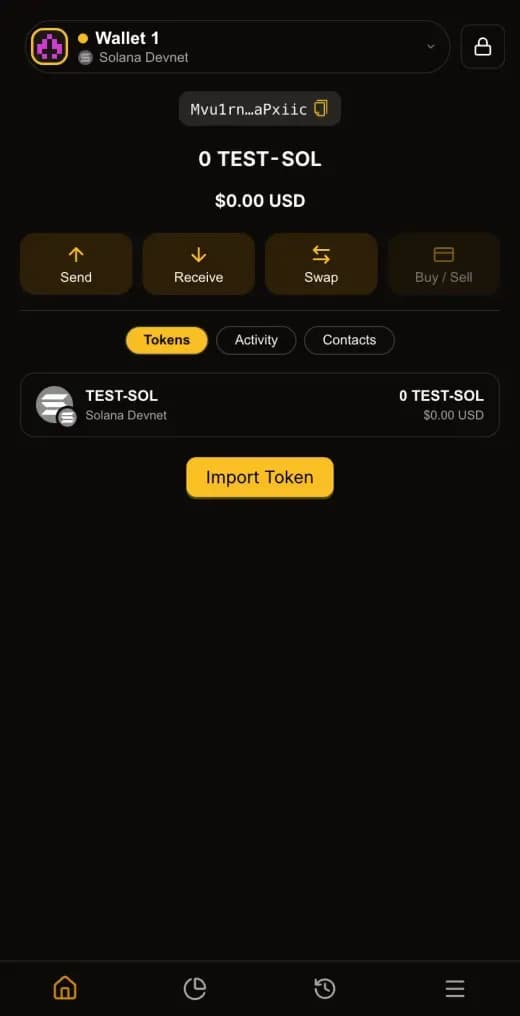
In the browser extension, select Solana in the chain selector, then click Send. In the side panel, the same button sits in the action row under your balance.
Confirm the balance shown at the top of the send screen. That figure is the spendable balance for the Solana account you are on — not your portfolio total across chains.
Step 2: Paste the recipient address
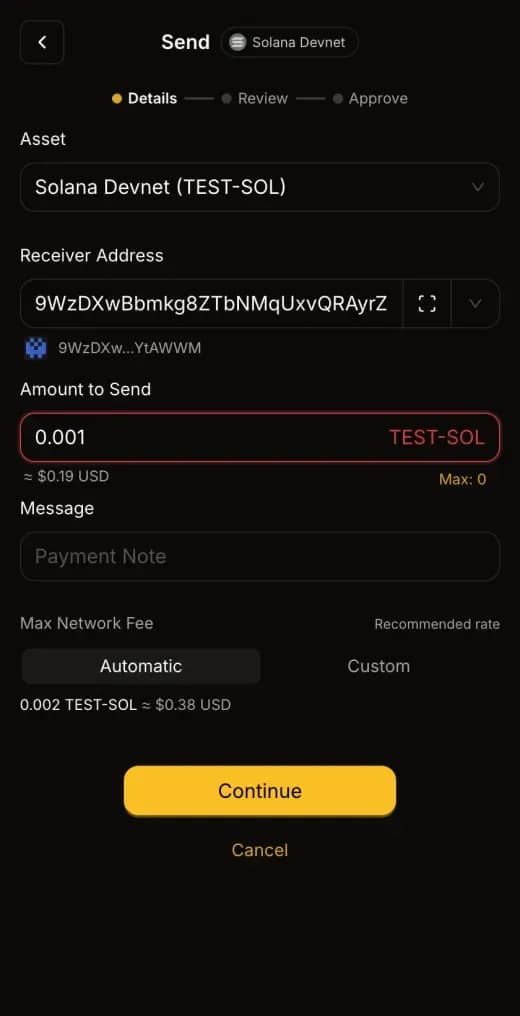
Paste the recipient's Solana address into the address field, then verify the first six and last six characters against the source you copied from. Read them aloud if that helps.
For an SPL token, paste the recipient's wallet address, not their token account address. SSP derives the correct associated token account for you and creates it if the recipient has never held that token.
If a single character is off, stop, clear the field, and re-copy from the original. This is the defence against address poisoning, where an attacker seeds your transaction history with an address that matches the first and last few characters of one you have used before. Phishing attacks targeting crypto users covers the wider pattern.
Step 3: Choose the asset and amount
Pick SOL for the native coin, or select an SPL token — USDC and FLUX ship by default, and any other SPL token SSP finds in your vault appears in the same list.
Enter the amount. SSP shows the fiat equivalent underneath in your chosen currency. If you are sending an SPL token, the token's decimals are read from the mint itself, and that value is embedded in the instruction that gets signed — a mint claiming different decimals will have its transaction rejected on-chain rather than silently sending the wrong amount.
You can attach an optional memo. It is written into the transaction as an SPL Memo instruction, which means it shows up on block explorers and is read back into your SSP history as the transaction note.
Step 4: Review what your device decoded
This is the step that matters most on Solana, and it is worth understanding rather than clicking through.
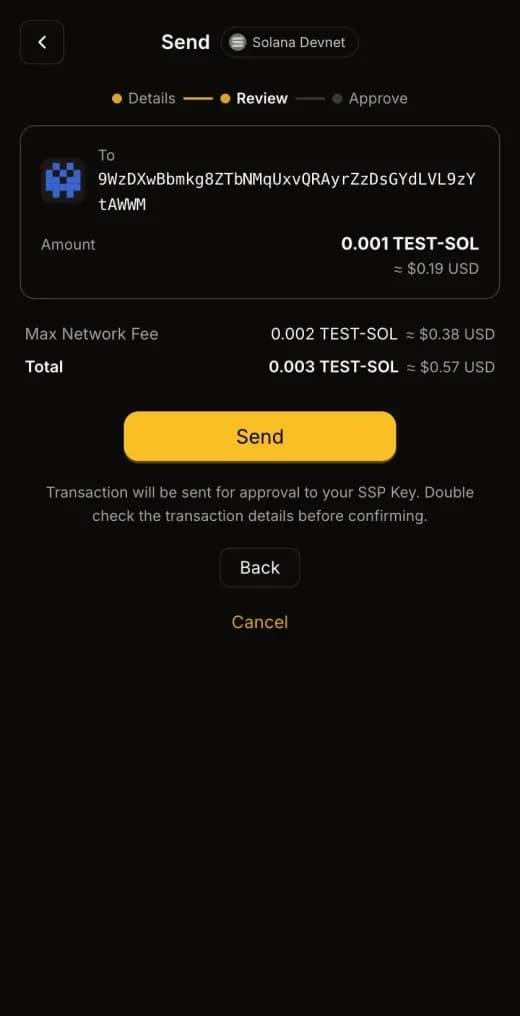
Solana transactions carry their meaning inside instruction data. A wallet that shows you what a server told it is showing you a claim, not a fact. SSP instead decodes the raw transaction bytes on your own device and compares the result against what is on screen: recipient, amount, and token mint.
Check three things:
- Recipient — matches the address you verified in step 2.
- Amount and asset — the number and ticker you entered, not a rounded or shifted value.
- Fee — the reimbursement to the fee payer, shown explicitly.
If the decoded bytes and the display disagree, SSP blocks signing outright rather than warning you. A mismatch at this point is an active-attack indicator, not a rendering bug.
Step 5: Approve on SSP Key
Confirm in the extension, then open SSP Key on your phone. The same details appear there, decoded independently on that device — your phone does not take the extension's word for the recipient or the amount either.
Approve on the phone and the transaction is broadcast. There is no rush: Solana transactions normally expire about a minute after they are built, but SSP anchors yours to a durable nonce, so you can approve minutes or hours later and it stays valid. Executing the transaction advances the nonce, so it can still only be used once. Durable nonces and two-device signing explains the mechanism.
Confirmation on Solana is fast — typically a second or two once broadcast. The transaction then appears in your activity list with its memo, if you set one.
What the first send costs
Your first Solana send costs more than every send after it, and the reason is worth knowing.
The first send creates two accounts that did not exist before: the multisig account itself and the durable nonce account. Both must hold rent to stay alive on-chain, and that rent comes to roughly 0.003 SOL, paid once. Every send after that costs on the order of 0.0001 SOL — the network fee plus a small margin.
Sending an SPL token to someone who has never held that token adds about 0.0025 SOL for the rent on their new token account. Sending the same token to the same person again does not.
You never have to fund a separate gas balance to make any of this work. SSP's relay operates a fee payer that fronts the cost and is reimbursed by your vault inside the same transaction — the reimbursement is part of the proposal your two devices approve, so it cannot happen without both signatures. Solana's fee documentation is the primary source on how base and priority fees are calculated.
If something goes wrong
The phone never showed the approval. Check that SSP Key is unlocked and has network access, then reopen the pending request from the extension. The durable nonce means the transaction has not gone stale while you sorted it out.
Signing was blocked at review. Do not retry blindly. A hard block means the decoded bytes did not match the display. Close the send, verify the recipient address from your trusted source again, and start over.
The balance looks lower than expected after sending. Compare against the fee note on the review screen. If this was your first send, the extra amount is the one-time rent described above, and it stays with your accounts rather than being spent.
You are not sure whether it landed. Open the transaction from your activity list and follow the explorer link. Solana finality is fast enough that a transaction which has not appeared within a few seconds of broadcast usually never entered the network at all — in which case nothing was spent, and you can safely rebuild the send.
If both of your devices are ever unavailable at the same time, nothing is lost — but nothing can move either. That is the whole point of 2-of-2 multisig, and it is worth being deliberate about where those two devices live.